> ## Documentation Index
> Fetch the complete documentation index at: https://docs.erstan.com/llms.txt
> Use this file to discover all available pages before exploring further.
# Setting up a workspace
> Walk through the onboarding wizard: name your workspace, connect NetSuite, add an AI provider, and invite teammates.
A **workspace** is your company account in Erstan, tied to one NetSuite environment (production or sandbox). The first time you create one, a guided setup wizard walks you through naming it, connecting NetSuite, adding an AI provider, and inviting teammates so agents have everything they need to work.
Erstan is in **Beta** (waitlist-gated). Creating a new company or workspace requires an access code, and **Owners** and **Admins** are the only roles that can create workspaces.
## Sign in
Open Erstan and you land on the login screen. Choose how to sign in:
Sign in with a Google account.
Sign in with a Microsoft account.
Sign in through your company's identity provider.
Enter your email, then continue with a password or a 6-digit code sent to your inbox.
With email, you can use a password or request a one-time code ("Check your email"); the screen also offers **Use password instead** and **Forgot password?**. A **Continue with NetSuite** option may appear depending on your environment.
By continuing you confirm you've agreed to the Beta agreement terms. Accounts not yet cleared for Beta see a waitlist state ("You are on the Erstan beta waitlist").
### Create a new company
If you're starting a fresh workspace rather than joining one, choose **Create new account** on the login screen, verify your identity, and enter the **access code** that unlocks company creation. Enter your **company name**, select **Create Company**, and continue into the setup wizard.
## The setup wizard
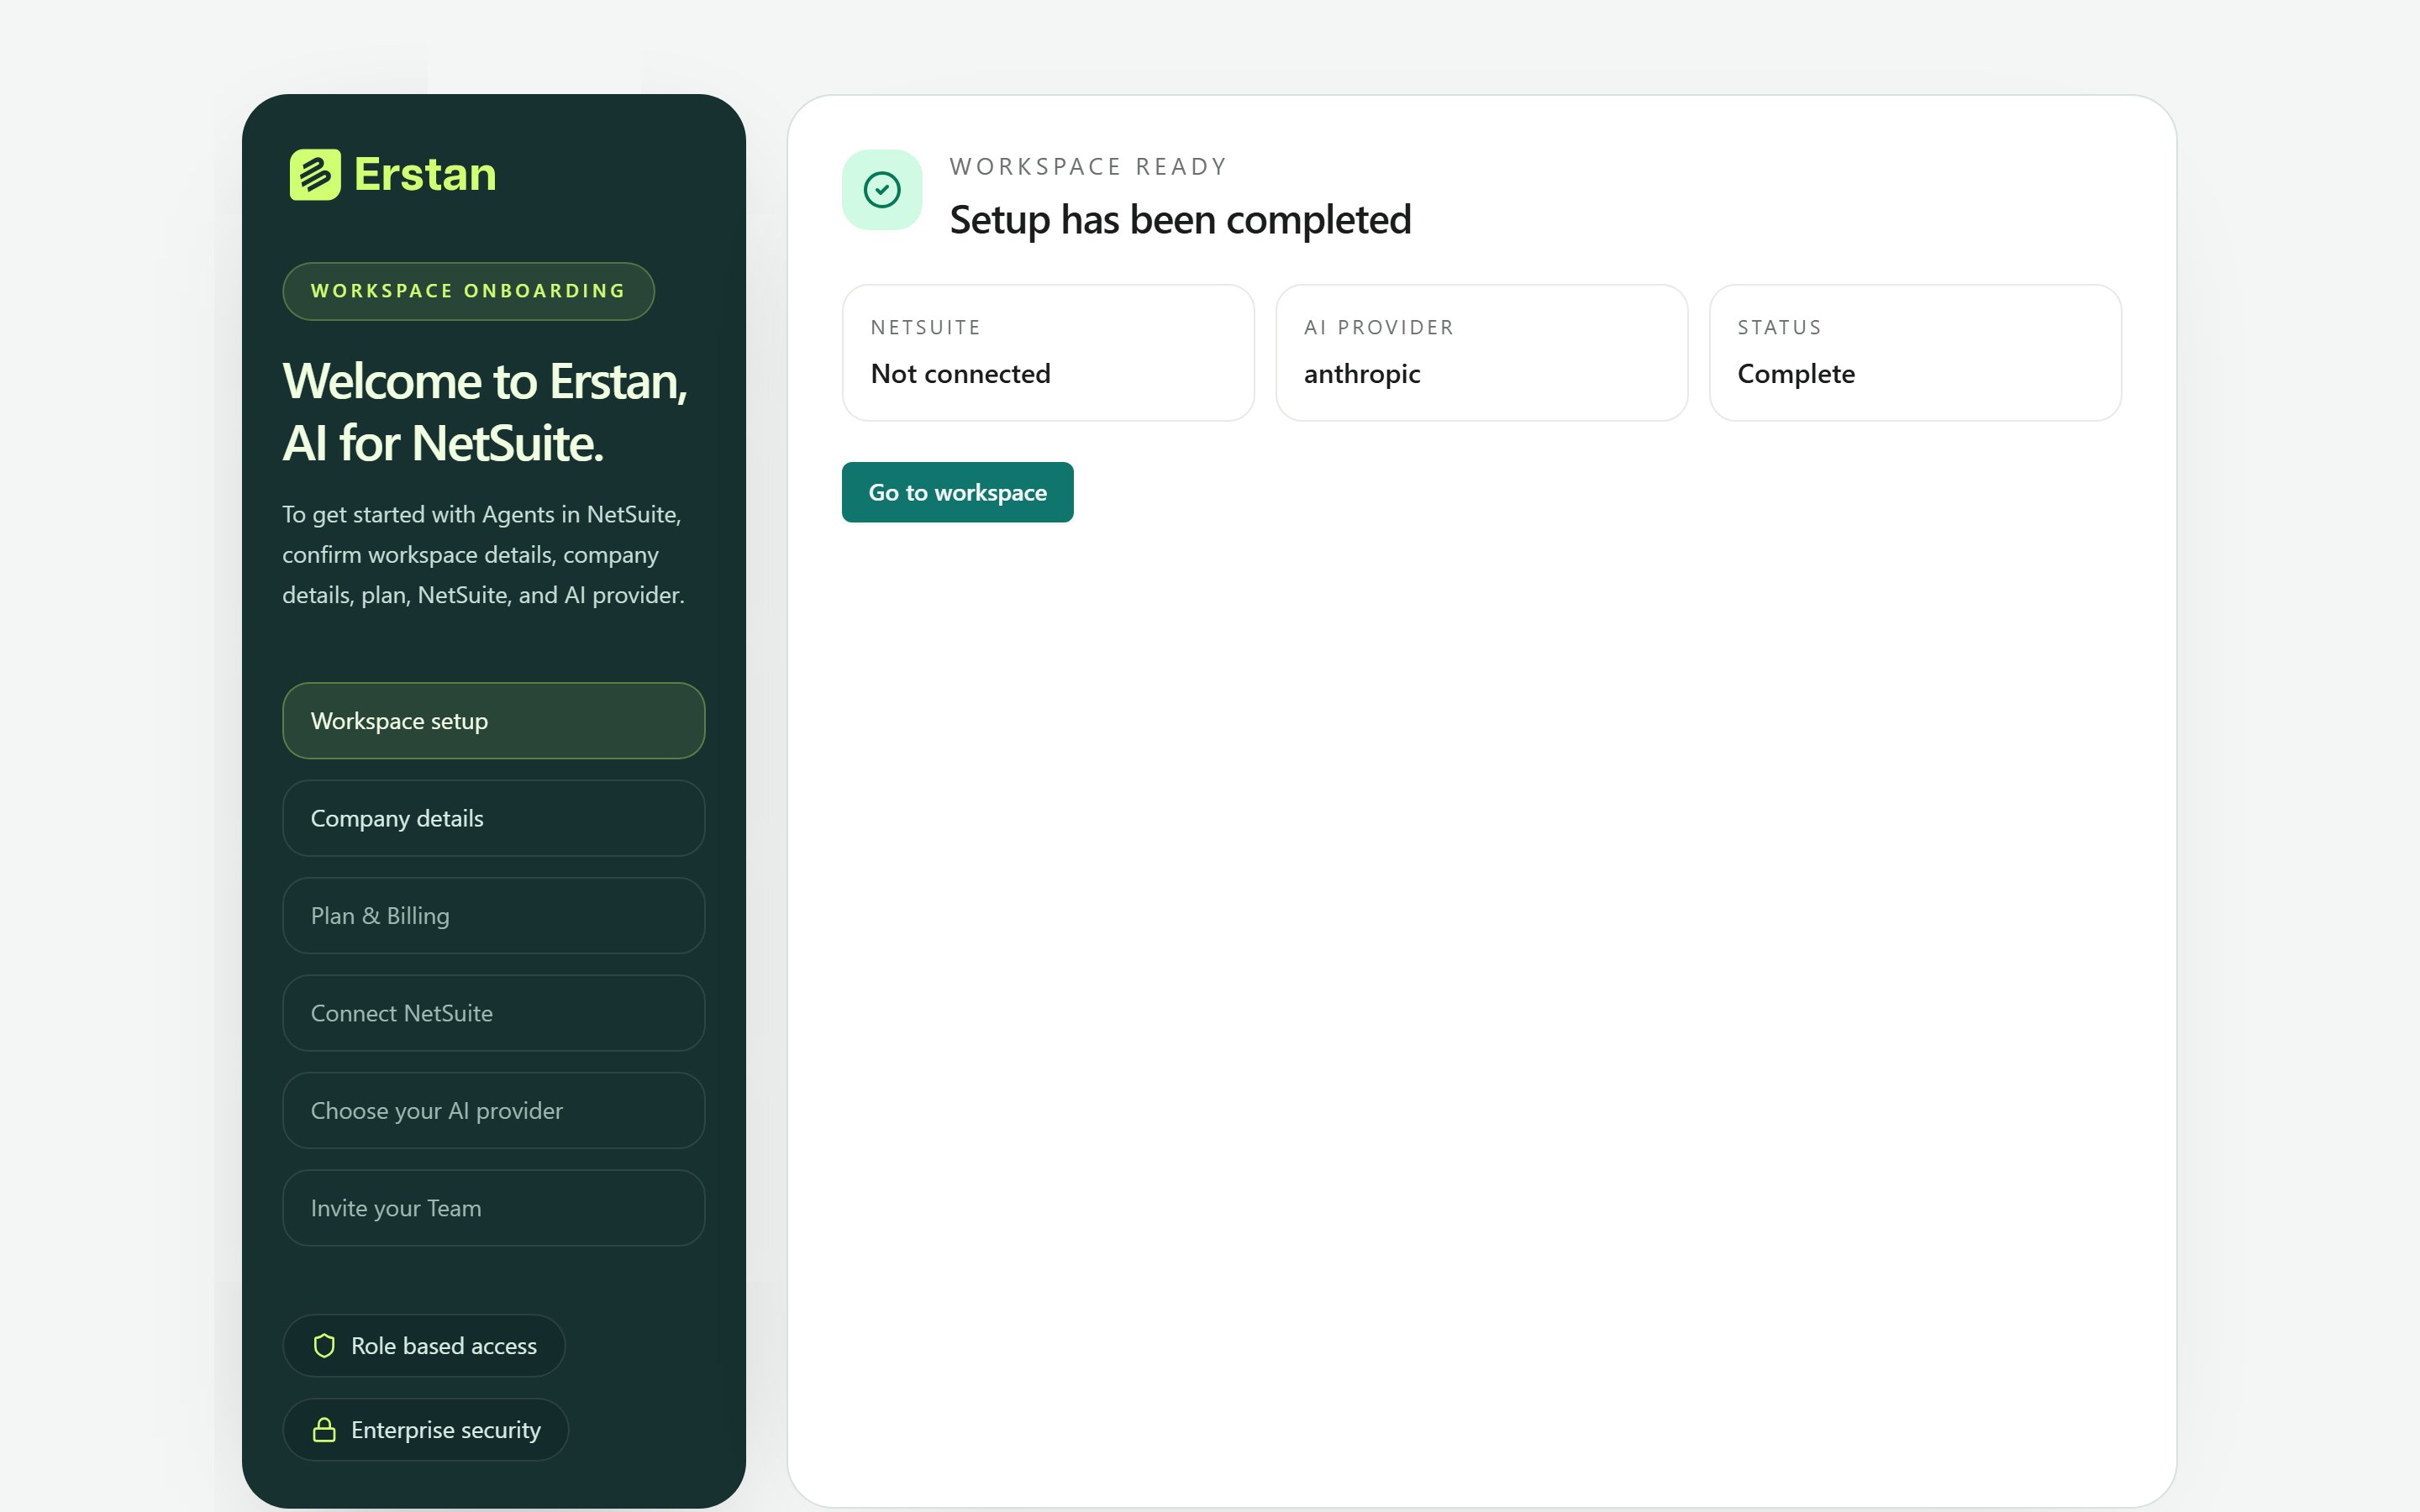
A workspace that still needs setup opens a six-step wizard. The left rail shows **Workspace onboarding** and your progress. Steps are gated — you finish each one before moving on, though the NetSuite, AI provider, and invite steps can be skipped and finished later.
 Name your workspace. Optionally upload a square icon (PNG, JPG, or .ico, up to 256 KB).
Choose **Company** (Personal is currently disabled), then enter the **Company name** and an optional **Legal name**.
Confirm the **Beta** plan. Free, Pro, Team, and Enterprise plans appear but show **Coming soon** and aren't selectable yet.
Enter your **NetSuite account ID** (for example `1234567` or `1234567_SB1`) and connect, or choose **Skip for now** and connect later. This sets up the shared workspace connection; see [Connecting NetSuite](/connectors/netsuite) for the full method choice and bundle install.
Connect **OpenAI** or **Anthropic** so chat and agents have a model to run on. You can also skip this and add a provider later — see [Connecting an LLM provider](/connectors/llm-providers).
Add teammate email addresses as chips to send invites, or **Skip for now** and invite people later.
When you finish, the **Workspace ready** screen appears and you can select **Go to workspace** to land on the [Home launchpad](/get-started/tour). Any step you skipped shows as **Skipped for now** in the completion summary, ready to finish from Connectors or Settings.
Each workspace maps to a single NetSuite account. If you enter an account ID already bound to another workspace, Erstan offers **Request access to join** or **Open workspace** instead of letting you reconnect the same realm — it won't create a duplicate binding.
## After setup: connect NetSuite for everyone
The setup wizard establishes the **workspace connection** to NetSuite. NetSuite uses **per-user authorization**: each member then authorizes their own NetSuite user and role before agents can act as them. Agents call NetSuite tools *as you*, so your own NetSuite permissions control what they can read and change.
Sets up the shared workspace connection (in the wizard or from **Connectors**), choosing the recommended **Erstan app** method or **Your own setup**. See [Connecting NetSuite](/connectors/netsuite).
Authorizes their own NetSuite user from the connector's Authorizations tab or from a chat **Authorization Required** card. See [Authorizing your NetSuite user](/connectors/netsuite-authorize).
Open **Connectors** to finish either step. Chat and agents need a connected AI provider, and most finance work needs NetSuite.
Agents act with your NetSuite role and pause for **approval** before any write. Keep write actions on **Require approval** rather than auto-approving them when you're getting started. See [Managing NetSuite: tools & write policy](/connectors/netsuite-manage).
## Who can do what
| Action | Owner | Admin | Member |
| --------------------------------- | ----- | ----- | ------ |
| Create a workspace | Yes | Yes | No |
| Run the setup wizard | Yes | Yes | No |
| Invite and manage people | Yes | Yes | No |
| Authorize their own NetSuite user | Yes | Yes | Yes |
Sandbox environments appear as a **Sub-workspace** nested under their production workspace, and the production workspace shows a **Has sandbox** badge. Use a sandbox workspace to try agents safely before pointing them at production.
## Next steps
Choose a method and finish the NetSuite connection.
Add OpenAI or Anthropic so chat and agents can run.
Invite teammates and manage roles.
Run your first agent end to end.
Name your workspace. Optionally upload a square icon (PNG, JPG, or .ico, up to 256 KB).
Choose **Company** (Personal is currently disabled), then enter the **Company name** and an optional **Legal name**.
Confirm the **Beta** plan. Free, Pro, Team, and Enterprise plans appear but show **Coming soon** and aren't selectable yet.
Enter your **NetSuite account ID** (for example `1234567` or `1234567_SB1`) and connect, or choose **Skip for now** and connect later. This sets up the shared workspace connection; see [Connecting NetSuite](/connectors/netsuite) for the full method choice and bundle install.
Connect **OpenAI** or **Anthropic** so chat and agents have a model to run on. You can also skip this and add a provider later — see [Connecting an LLM provider](/connectors/llm-providers).
Add teammate email addresses as chips to send invites, or **Skip for now** and invite people later.
When you finish, the **Workspace ready** screen appears and you can select **Go to workspace** to land on the [Home launchpad](/get-started/tour). Any step you skipped shows as **Skipped for now** in the completion summary, ready to finish from Connectors or Settings.
Each workspace maps to a single NetSuite account. If you enter an account ID already bound to another workspace, Erstan offers **Request access to join** or **Open workspace** instead of letting you reconnect the same realm — it won't create a duplicate binding.
## After setup: connect NetSuite for everyone
The setup wizard establishes the **workspace connection** to NetSuite. NetSuite uses **per-user authorization**: each member then authorizes their own NetSuite user and role before agents can act as them. Agents call NetSuite tools *as you*, so your own NetSuite permissions control what they can read and change.
Sets up the shared workspace connection (in the wizard or from **Connectors**), choosing the recommended **Erstan app** method or **Your own setup**. See [Connecting NetSuite](/connectors/netsuite).
Authorizes their own NetSuite user from the connector's Authorizations tab or from a chat **Authorization Required** card. See [Authorizing your NetSuite user](/connectors/netsuite-authorize).
Open **Connectors** to finish either step. Chat and agents need a connected AI provider, and most finance work needs NetSuite.
Agents act with your NetSuite role and pause for **approval** before any write. Keep write actions on **Require approval** rather than auto-approving them when you're getting started. See [Managing NetSuite: tools & write policy](/connectors/netsuite-manage).
## Who can do what
| Action | Owner | Admin | Member |
| --------------------------------- | ----- | ----- | ------ |
| Create a workspace | Yes | Yes | No |
| Run the setup wizard | Yes | Yes | No |
| Invite and manage people | Yes | Yes | No |
| Authorize their own NetSuite user | Yes | Yes | Yes |
Sandbox environments appear as a **Sub-workspace** nested under their production workspace, and the production workspace shows a **Has sandbox** badge. Use a sandbox workspace to try agents safely before pointing them at production.
## Next steps
Choose a method and finish the NetSuite connection.
Add OpenAI or Anthropic so chat and agents can run.
Invite teammates and manage roles.
Run your first agent end to end.