

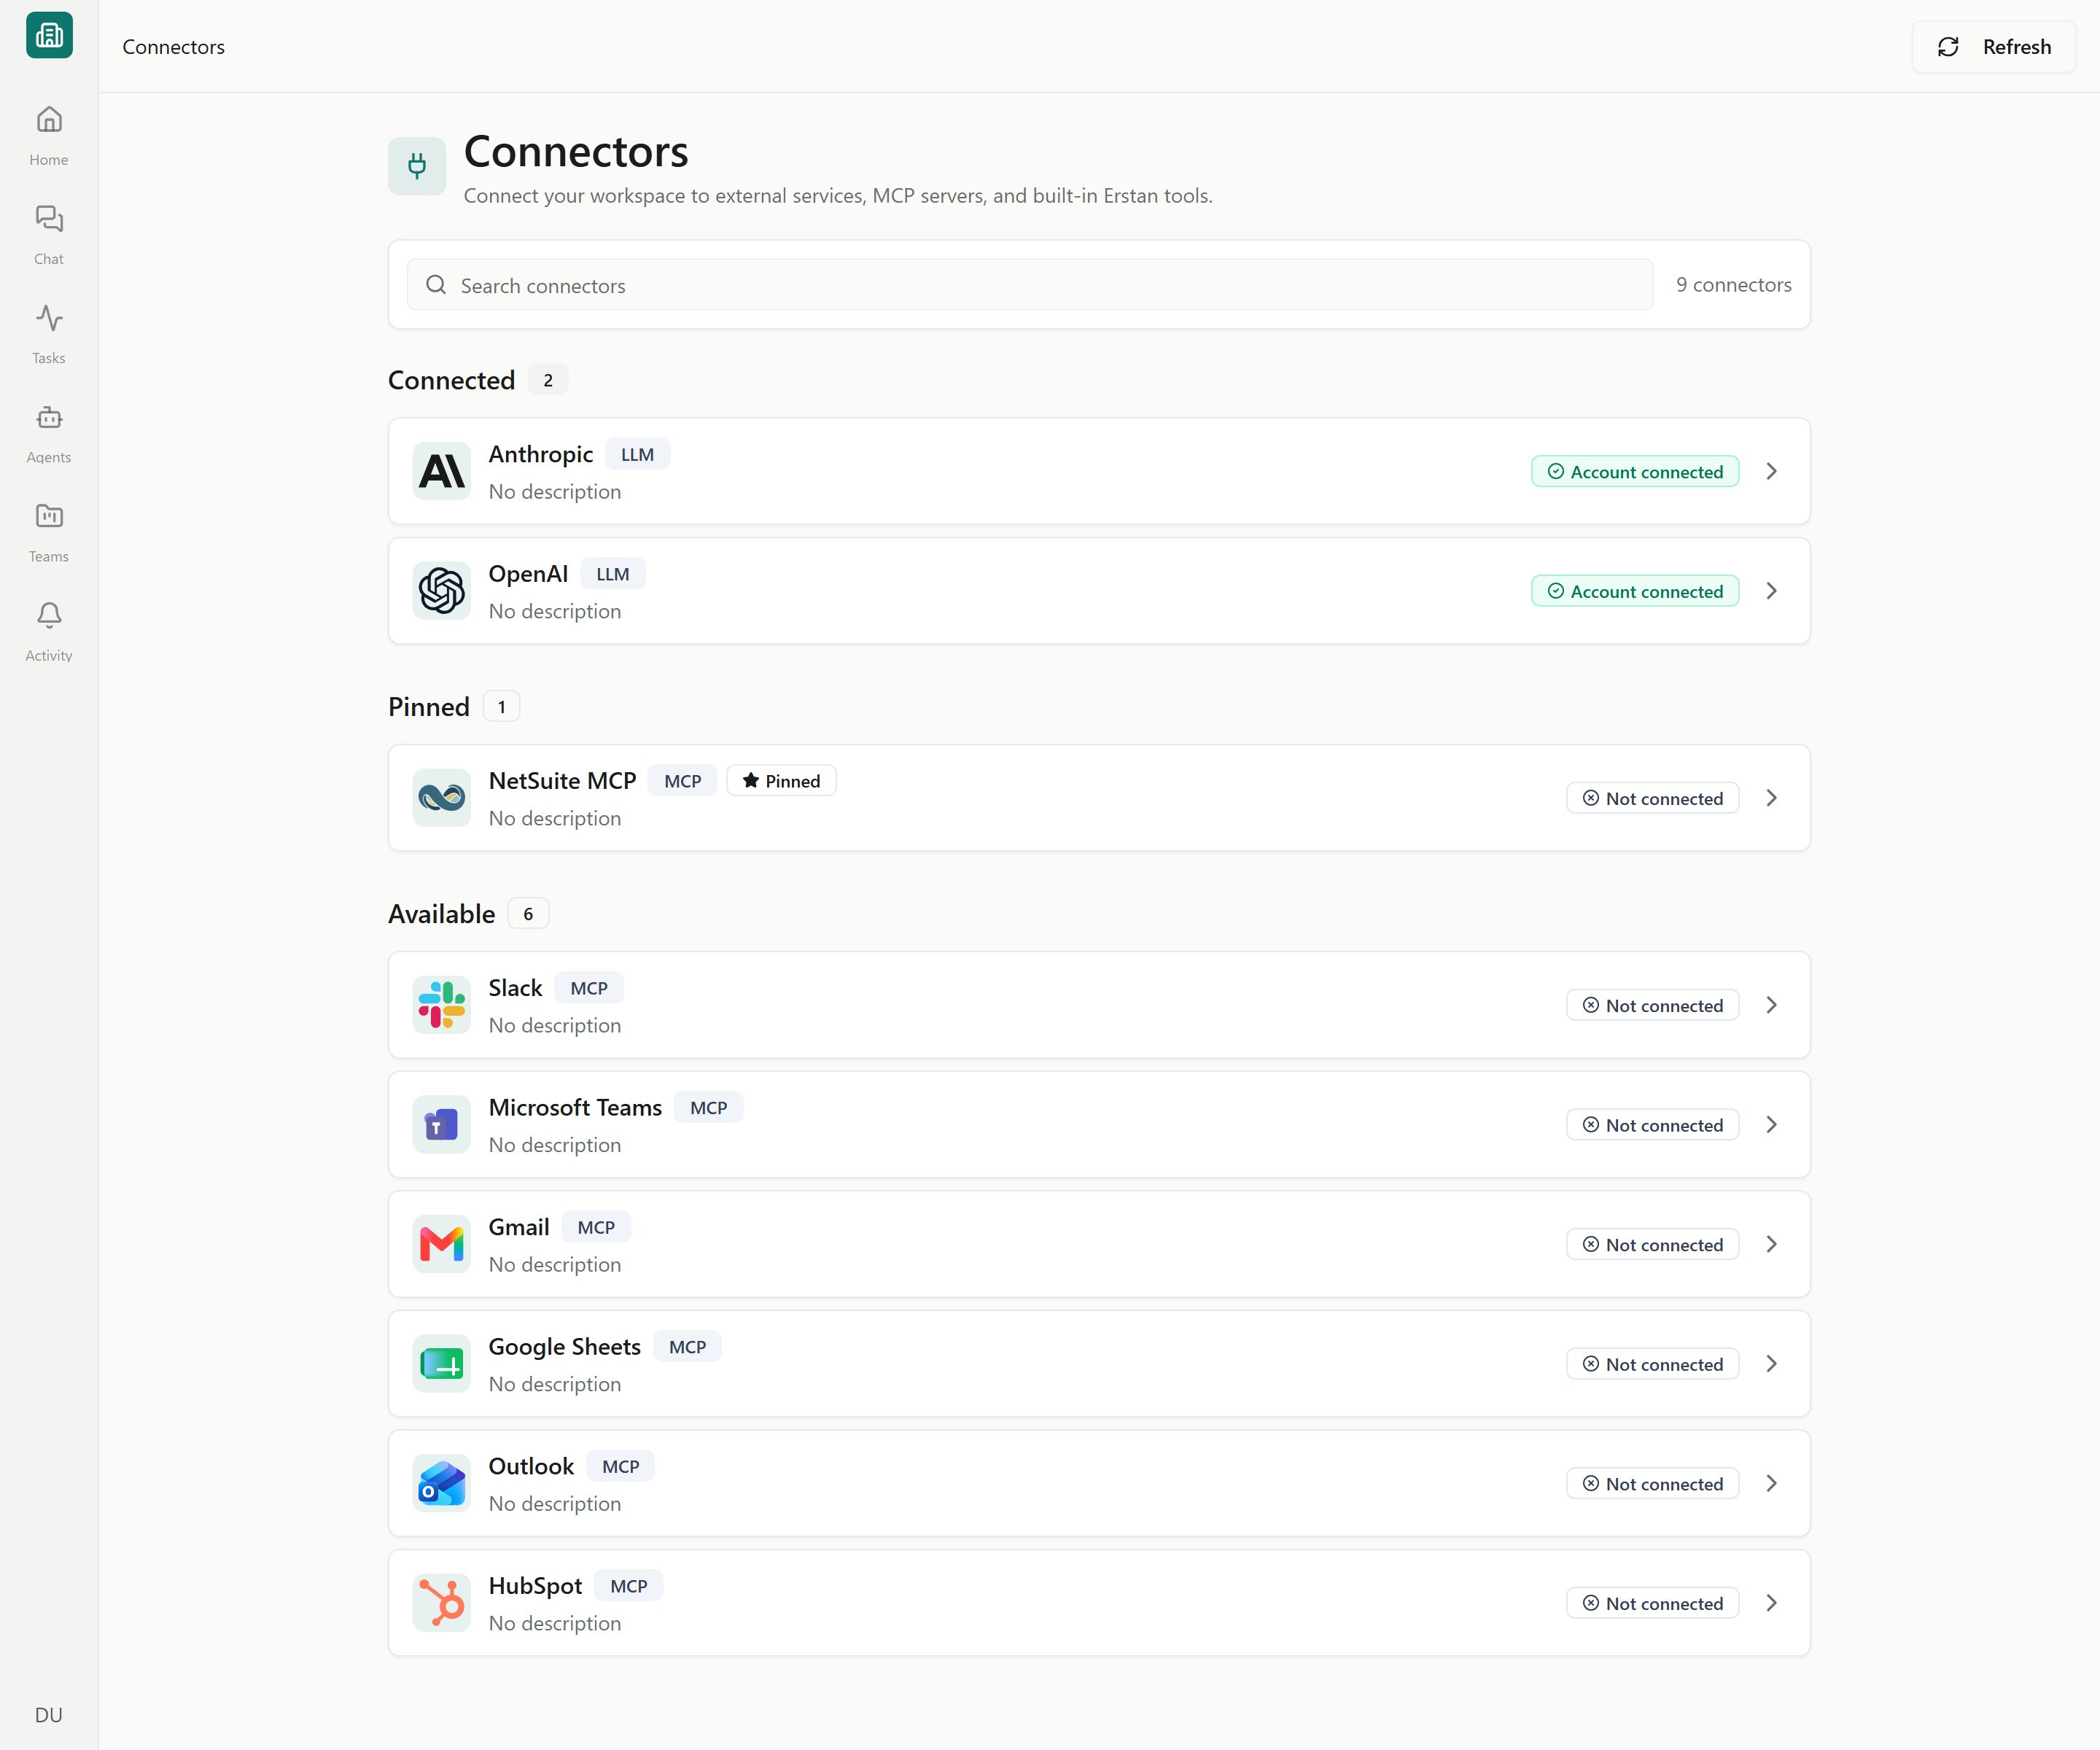
Connectors
Erstan loads its connector catalog from the backend, so the exact systems you see under Available depend on what your workspace has enabled. If a connector shows a disabled Coming Soon button, it is listed but not yet available to connect.
Slack
Erstan has two Slack connections with different purposes:
You need an Erstan account, access to the relevant workspace and Agents, and permission to install or approve the Slack app. Erstan is a separate service with its own subscription. The agent side panel requires a paid Slack plan; direct messages and channel mentions are available without it.
Install the workspace bot
1
Open the connector
Sign in to Erstan, open Connectors, and choose Slack workspace bot. A workspace owner or admin manages this shared connection.
2
Connect
Click Connect or Connect Erstan to Slack. Select your Slack workspace, review the permissions, and complete Slack’s authorization flow. Your Slack administrator may need to approve the installation.
3
Confirm the status
Return to Erstan and use Test connection on the Setup tab. Invite
@erstan to a channel and mention it, or open a DM with the app. Reply in the same thread to continue the conversation.Connect your personal account
Open Connectors → Slack personal account and choose Authorize Slack. Review Erstan’s app, your Slack account, and the requested permissions. The tools appear on the connector’s Tools tab. Creating content, sending or scheduling messages, and uploading files are allowed by default. Editing or deleting existing content and changing access require approval by default. Your configured Agent, chat and workspace policies still apply. Personal tools use Erstan’s own Slack OAuth app. They support searching messages and files, reading conversations and user profiles, sending and scheduling messages, reactions, and creating, editing, sharing, or deleting Canvases. They also manage channels, pins and bookmarks. File tools read attachments and upload files attached, saved, or generated in Erstan, up to 25 MiB. Upload preparation fixes the source version and destination before execution. Full native Canvas content and OCR are not included; Canvas section lookup returns section IDs for edits. Check the connected person’s name and Slack workspace on Setup. On Tools, search or browse the 46 tools in Messages, Canvases, Channels and conversations, People, Files, Reactions, Pins, and Bookmarks. Filter by category or read/write actions. Technical connection details are under Advanced. Slack event triggers are configured on Slack workspace bot. Existing grants do not acquire new permissions automatically. If Setup shows missing permissions, choose Update Slack permissions after an administrator has configured the requested user scopes on Erstan’s Slack app. You can update your own authorization without being an Erstan administrator. Tools with sufficient permissions remain usable. Creating a Canvas requirescanvases:write; on free Slack plans, provide a channel for the Canvas. Newly created Canvases include their link when Slack makes it available. If link lookup fails, the creation still succeeds; ask for the existing Canvas link instead of creating it again.
Configured Slack message steps can send through the workspace bot or an Agent’s custom bot. A scheduled run that calls a personal Slack connector tool still acts as the connected person. Agent messages include Via Erstan · Agent name and a run link; attribution does not change the Slack sender.
Review actions and AI outputs
Erstan’s workspace access and approval settings also apply to requests started in Slack. Review important information and proposed actions: AI-generated responses, summaries, and other outputs can be inaccurate or incomplete. Relevant prompts, conversation context, attachments, and tool results may be sent to the configured AI provider. Conversation and execution history may be retained in Erstan. See the privacy policy and terms of service before connecting.Slack support
Contact support@erstan.com for installation or connection help; no Erstan account is required to email support. Include the connection name, tool name, and error text, but do not send passwords, access tokens, or private message content.- The bot does not respond: invite it to the channel, mention it, and check the requester’s Erstan workspace and Agent access.
- Authorization succeeds but a tool fails: run Test connection and check the reported permission or provider error. A
missing_scopeerror requires the app to request that scope and the account to authorize it. - A message comes from your own profile: the run used a personal Slack tool. Use a configured bot message step when the message should come from the bot.
Business apps
Erstan also connects to a growing set of popular business apps so your agents can read and act across the tools your team already uses — for example Gmail, Google Sheets, Google Drive, Microsoft Teams, Outlook, and HubSpot, with more added over time. An agent can pull a spreadsheet into a reconciliation, draft an email, post to a channel, or update a CRM record alongside its NetSuite work. These app connectors are provisioned for your workspace and appear under Available in the Connectors list. You connect each one the same way as Slack:1
Find the app
Open Connectors and locate the app under Available (use Search connectors to filter).
2
Connect with OAuth
Click into it and choose Connect. A sign-in window opens for that app so you can approve the access Erstan requests.
3
Use it from agents and chat
Once connected, the app’s actions appear as connector tools your agents and chats can use — governed by the same per-tool write policy as every other connector.
The exact apps available to you depend on what your workspace has enabled, so your Available list may differ from the examples above. New connectors appear here automatically as they are turned on for your workspace.
MCP servers
An MCP server is a Model Context Protocol endpoint that exposes a set of tools your agents can call. When you add one, its connector detail page shows the MCP endpoint URL and the tools discovered from it, which then become available to agents like any other connector tool.- The connector lists its Available Tools on the Tools tab, discovered from the server.
- If the server can’t be reached, the connector reports Endpoint unhealthy — check the endpoint and re-sync from the Connectors list with Refresh.
Built-in Erstan tools
Some connectors are built in to Erstan and need no setup — they show a Built in badge and No setup required. These give agents core capabilities (such as working with your team content) and expose only a Tools tab; there is nothing to authorize or disconnect. You can still review what they provide and set a write policy per tool, the same as any other connector.The shared connect, authorize, and manage pattern
Most connectors follow the same lifecycle, so once you’ve connected one you know them all. The connector detail page organizes everything into tabs.Setup — connect and verify
Setup — connect and verify
Shows the current connection status and a Test connection action. For connectors that need re-approval, an action banner here prompts you to authorize, re-authorize, or reconnect. It also lists configuration metadata (such as the integration slug and authentication type) and, where relevant, the MCP endpoint URL.
Tools — what agents can run
Tools — what agents can run
Lists the connector’s Available Tools, each with a write policy you can set to Allow, Require approval, or Deny, plus a test action to try a tool. This is how you control which actions agents can take automatically.
Connection statuses
Connectors share a common set of status badges so you can tell at a glance whether a connection is working.See Connection troubleshooting for what to do when a connection expires, goes unhealthy, or needs re-authenticating.
Managing any connector
To remove a connection, use Disconnect (or Disconnect Account / Disconnect Workspace Integration) on the relevant tab, and Delete to remove a non-built-in connector entirely. Built-in connectors can’t be disconnected or deleted.Next steps
Connectors overview
See the full Connectors list and how connections are grouped.
Connecting NetSuite
Set up the flagship connector for your finance data.
Connecting an LLM provider
Review managed AI access, customer keys, and enabled models.
Approving AI actions
Review write actions before agents run them.